Overview: This article will introduce the process of saving alarm records on the SD card. The SD card must be installed and formatted correctly in the camera.
Notes:
1)Before logging into the camera be sure to disable any Pop Up Blockers running on the web browser. They will interfere with the web browser interaction with the camera and cause configuration problems.
2)Please Be sure to login to the camera before beginning the steps below.
Step 1: Setup of the Motion Detection Settings
1)Navigate to Settings → Alarm → Motion Detection
2)Check the checkbox by Enable
3)Check the checkbox by Recording for the alarm action
4)Set the Detection Area (the area the camera is monitoring for motion related events)
5)Set the Schedule that the camera will follow to monitor for motion detection events.
6)Click “Save” to save the configuration information to the camera.

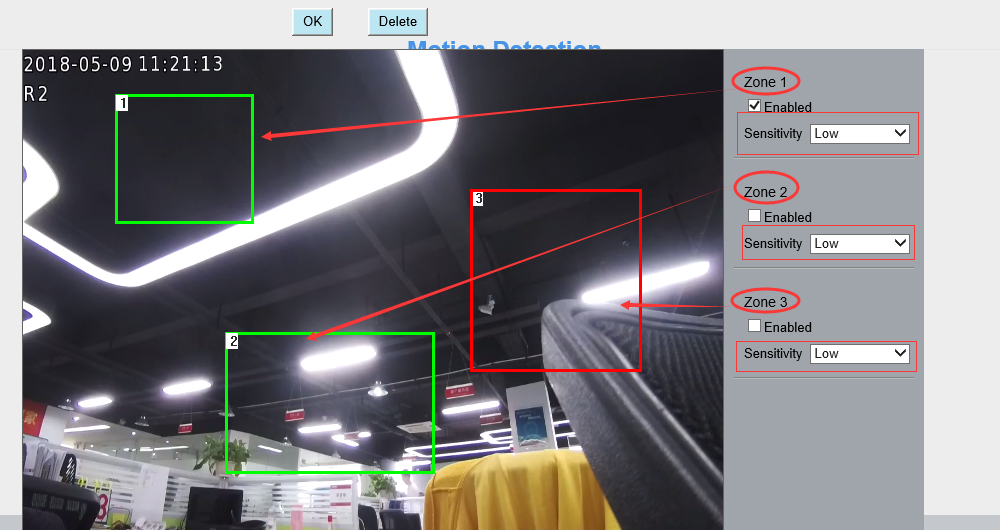
Attention:The settings on Detect Area of cameras C2/FI9900EP/FI9900P/FI9901EP/FI9961EP/R2/R4/FI9928P are different,you can set 3 different zooms for these cameras with different sensitivity please check the below picture:

Technical Notes:
1)DO NOT forget to set the alarm schedule which is indicated in Red.
2)Verify the time is set correctly on the camera or the scheduled motion detection events will be recorded during the wrong time frame.
3)DO NOT forget to set the alarm monitoring area which is indicated by the red grids.
Step 2: Setup the Storage Location
Navigate to Settings → Record → Storage Location
Select SD Card from the Recording Location drop down menu and click Save

Note: After the configuration is completed it is recommended to perform a quick test to confirm the alarm settings trigger an alarm event and save a file to the SD card.

